Deploy Applications Using Payara Server Admin Console
Payara

In this blog, I will explain how to deploy applications using the Payara Server Admin Console. You can also watch this super short video (under 2 minutes) to see how to deploy applications using NetBeans, the Payara Server Admin Console, or using admin commands.
Here’s how to deploy and undeploy applications with the Payara Server Admin Console:
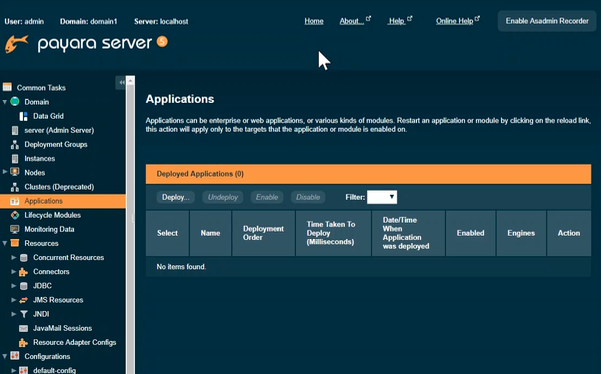
Use the Deploy Applications or Modules page to deploy an application. Click “Applications” on left side of Admin Console to open the page.
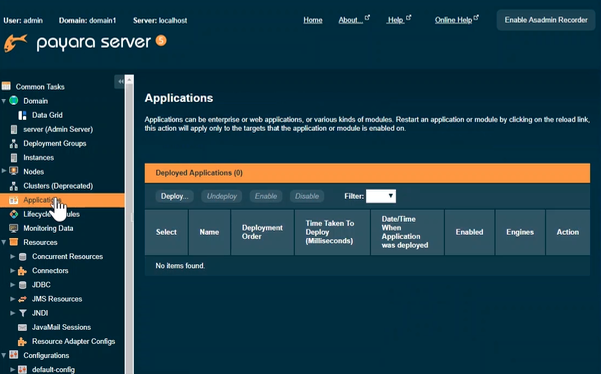
Next, click “Deploy” button to deploy an application.

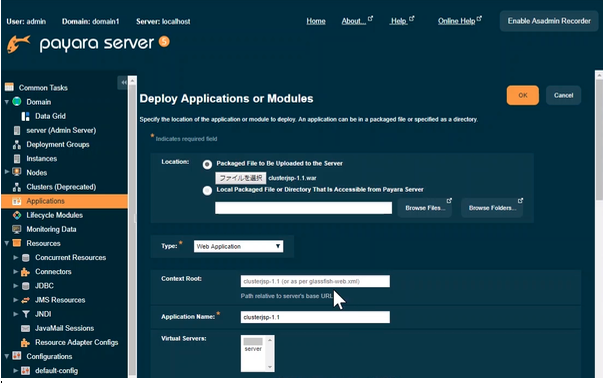
The Deploy Applications or Modules page contains the options for deployed applications. At first, it shows general options – “Location” and “Type”. Additional options appear only after you specify the Location field for the application.
Location
The location of the archive for the application that you are deploying.
The following options specify from where the archive is accessible and whether the archive is a file or a directory:
Type
The type of the application. Available choices are as follows:
If you set “Location” by “Packaged File to Be Uploaded to the Server”, the suitable type would be selected.
For the purposes of this blog, I will explain the rest of the steps using “Packaged File to Be Uploaded to the Server” as the example.
Open the Choose File dialog and choose the application archive, e.g. WAR file (clusterjsp-1.1.war)
“Type” is set as “Web Application” automatically.
Additional Options for Web Applications
Below are some of the important options from all additional options available for Web application. You may learn more about those options in the Payara Server Documentation or Online Help on Admin Console (Payara Server 5.191 or later) in detail.
Context Root
The path to the application. In default, this value is archive file name or the value setting in glassfish-web.xml deployment descriptor. (e.g. clusterjsp-1.1) In the URL of the web application, the context root immediately follows the port number. (http://host:port/context-root/…)
Application Name
The name of the application. This value is mandatory, but Admin Console set the archive file name as initial value.
After setting additional options, click “OK” button to deploy the application. The application will then be added in the list of Deployed Applications on the Applications page.
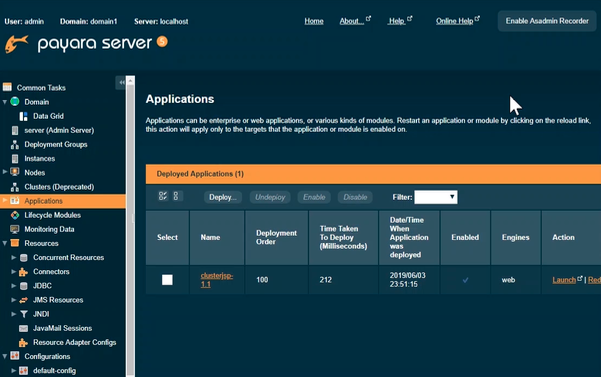
For this example, access http://localhost:4848/clusterjsp-1.1 to confirm running this application.
You may also show this URL to “Launch” in the list of Deployed Applications in case that the application has suitable index page.

Undeploy Application
We can undeploy unused applications. Choose the application that has been already unused in the list of Deployed Applications and click “Undeploy” button to undeploy.
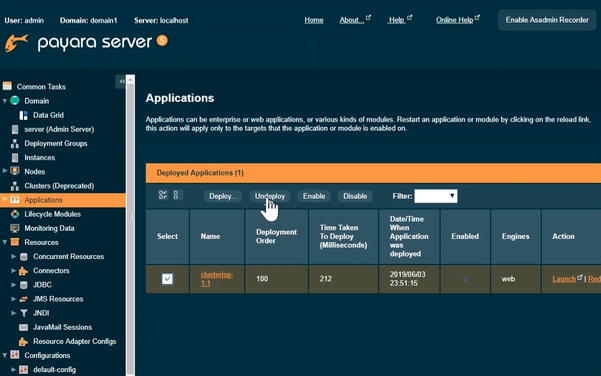
The applications that were undeployed are removed from the list of Deployed Applications.
For more getting started tips for using the Payara Platform, check out our Getting Started Guide:
{{cta(‘895dc2c7-4891-4bae-94c0-4bcca626e52f’,’justifycenter’)}}
Share:

 4 minutes
The March 2026 release brings important platform modernization, stability improvements, and comprehensive bug fixes across the Azul Payara Platform […]
 1 minute
Earlier this week, we’ve launched the 2026 Payara Platform Community Survey and we’d love to hear from you. If […]
5 minutes
The February 2026 release of the Payara Platform is centered on a major initiative to streamline the platform. This involves removing […]
Y si necesito subir librerías como mail y utilizo un timesessionbean lo de time elegí la opción ejb y me sirvió pero enviar correo lo hago mediante una librería y no se como apuntar correctamente a esa carpeta me podrías ayudar por favor
Gilson, si necesitas añadir librerias compartidas para tu aplicaciones, lo recomendable es que las adiciones de forma manual a la carpeta ${PAYARA_DOMAIN}/lib o utilices el comando add-library como lo estipula la documentacion oficial: https://docs.payara.fish/community/docs/5.2020.5/documentation/payara-server/asadmin-commands/misc-commands.html#add-library-command