Payara for Beginners: Integrating Payara Server with Oracle 11g XE
Product News
Most modern-day web applications need some way to store data in a database. Oracle arguably gives you the best RDBMS solution when it comes to security, support, and scalability. Oracle XE is the version that is most suitable for developers for small or personal projects, and should also be compatible with the full version of Oracle database. This guide will walk through the configuration of Oracle XE, and how to configure Payara Server to use it.
In this guide I will assume that you’re using Ubuntu. Ubuntu isn’t a supported OS by Oracle, so it is more difficult to install and you won’t get support from Oracle for it. This shouldn’t be a problem as this Oracle install is created mainly for testing, and Ubuntu is a popular development environment. In a production environment I strongly recommend that you use one of the supported operating systems listed in Oracle’s documentation.
Installing Oracle XE is outside the scope of this blog, but it isn’t by any means an easy process. If you have trouble installing Oracle XE, it would be best to read through one or both of the following tutorials:
You should have Oracle successfully installed if you are able to run (as the Oracle user):
sqlplus / as sysdb |
If you haven’t done so already, create a user for accessing the database. This is because it’s generally bad practice to have anyone except the admin using a user that has all database rights. Create a user from sqlplus as below:
CREATE USER username IDENTIFIED BY password;GRANT connect,resource TO username; |
Of course, in your environment, you will need to replace “username” and “password” with whatever you want your user’s credentials to be. It’s possible at this point to run into an error; If you do, it might be due to a faulty install, and you should remove the Oracle install as described in the first linked article, and then reinstall using another one of the guides. If everything has been run successfully, you should be able to use sqlplus to login to your db using either of the following formats:
sqlplus #Then enter your username and password when prompted |
sqlplus username/password@localhost |
bin/asadmin add-library /path/to/download/jdbcdriver.jar`'bin/asadmin restart-domain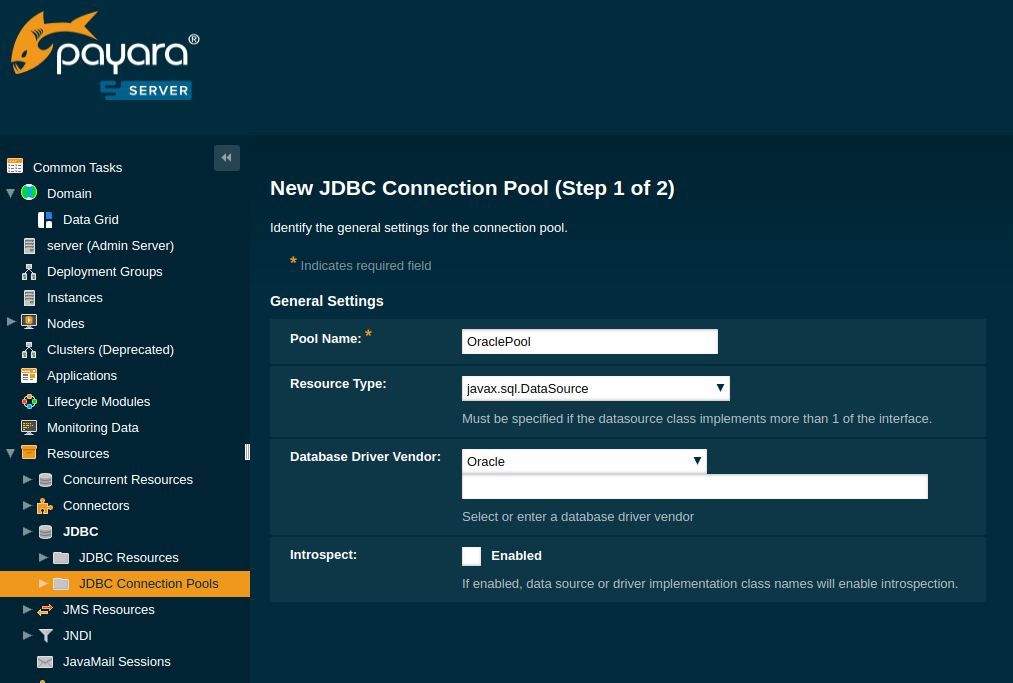
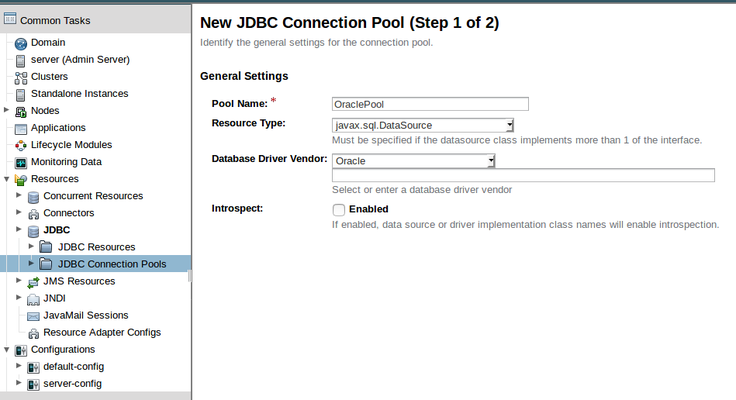
Fill in the form as shown above. For the purpose of this guide I have named the pool ‘OraclePool’. Click Next.
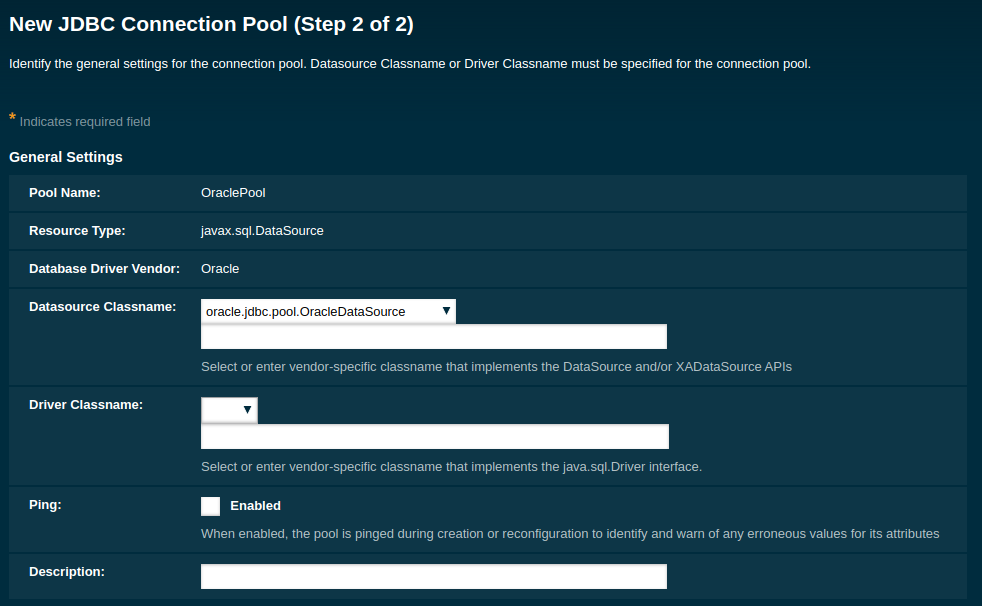
3. On the next page make sure that the Datasource Classname is ‘oracle.jdbc.pool.OracleDataSource’.
If it doesn’t appear as above, then it is possible that the ojdbc6.jar was put in the wrong folder, or you forgot to restart the domain. If so don’t worry, you can create the connection pool anyway, and restart it after before pinging the connection.
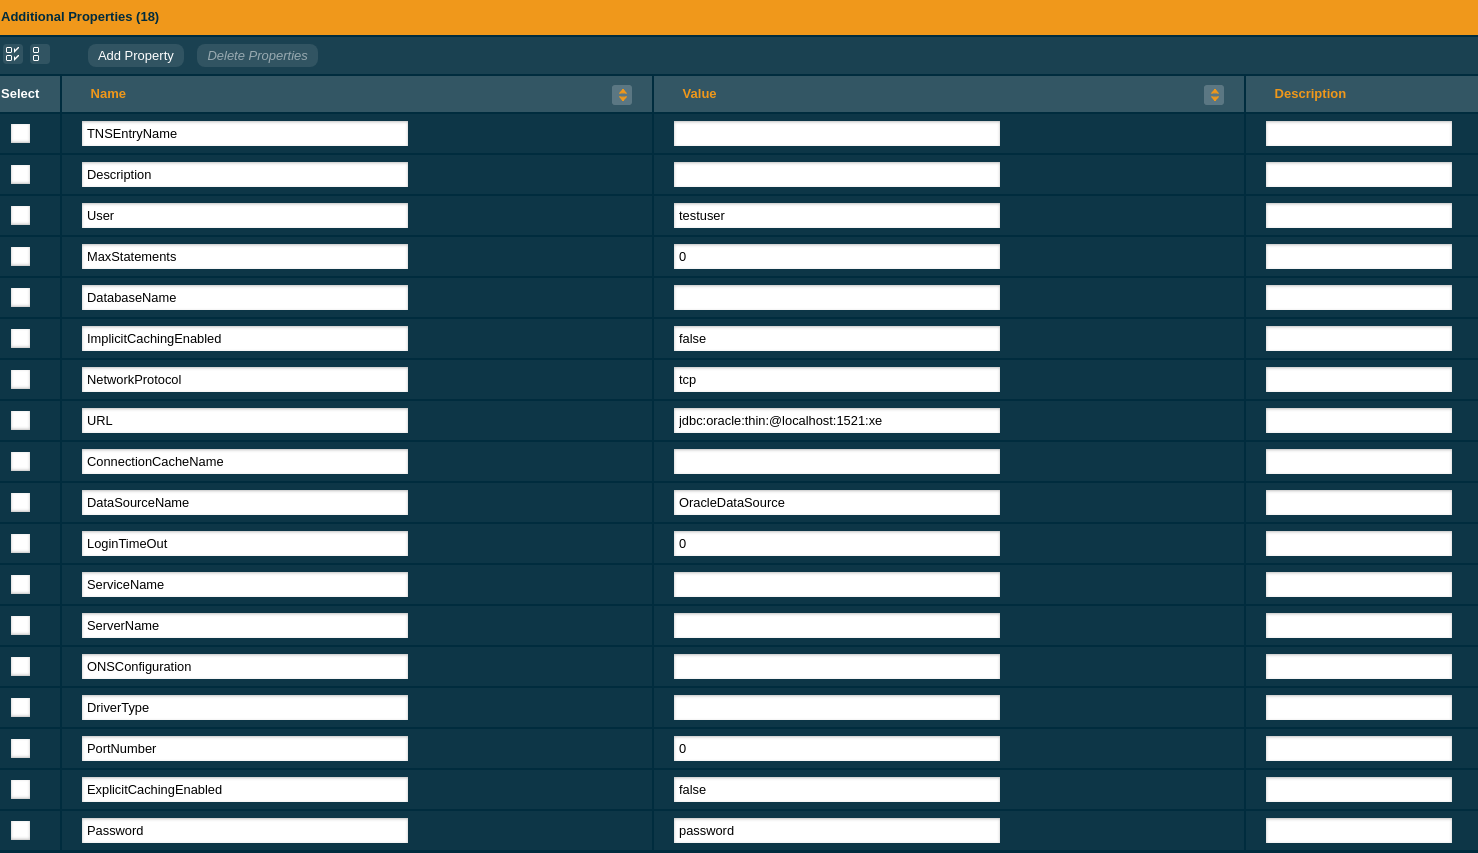
At the bottom of the page, fill in the following fields:
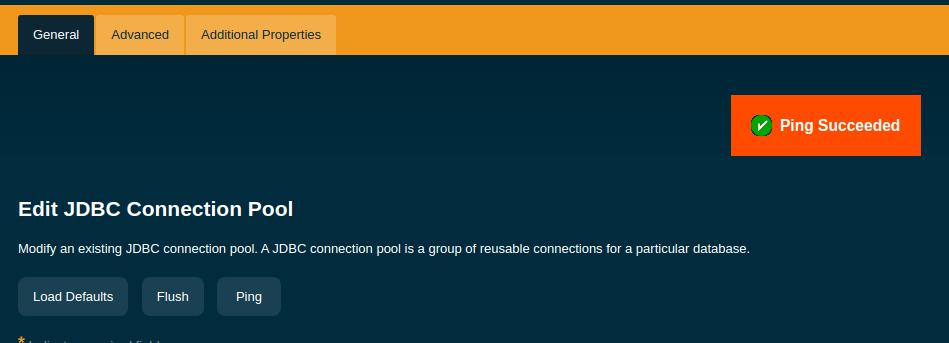
jdbc:oracle:thin:@localhost:1521:xeOnce you’ve finished and clicked ‘Finish’, click on the newly created connection pool and click ‘Ping’. If everything has been configured correctly, you should get a success message as shown below.
4. Create a JDBC resource
So you’ve now got a connection pool, but to start actually using that in your code, you need to create a resource for accessing with the @Resource annotation.
You’ve now successfully linked Payara Server and Oracle! Your JDBC code should now work with your Oracle install.
5. Use the resource in your code!
Below is a simple example of directly accessing the resource we have just created:
@Resource(lookup = "jdbc/oracledb")DataSource ds;protected void testConnection(){ try (Connection conn = ds.getConnection(); PreparedStatement stmt = conn.prepareStatement("Select 1 from dual"); ) { out.println("Executed test Oracle DB statement and got: " + stmt.execute()); } } catch (SQLException ex) { Logger.getLogger(SelectServlet.class.getName()).log(Level.SEVERE, null, ex); }} |
A more full example which uses a data source is available in our Payara Examples repository, under payara-micro/datasource-example, though this example uses MySQL and configures the JDBC resource at deploy-time.
{{cta(‘a591925d-60f3-4d12-9da6-6123459ccf71’)}}
 4 minutes
The March 2026 release brings important platform modernization, stability improvements, and comprehensive bug fixes across the Azul Payara Platform […]
5 minutes
The February 2026 release of the Payara Platform is centered on a major initiative to streamline the platform. This involves removing […]
3 minutes
As we begin 2026, we’re pleased to announce new releases across all Payara Platform editions this January: Payara Platform […]
