Back to Basics – Installing Payara Server 4 on Ubuntu
Product News

This is Part 1 of our ‘Payara Server- Back to Basics’ series, where we will show you a step-by-step overview of how to install Payara Server 4 on Ubuntu. See Part 2 – How to Deploy an Application on Payara Server here.
Note: There is an updated version of this blog available for Installing Payara Server 5 on Ubuntu.
1. Make sure the appropriate JDK is installed:
Java EE 7 requires JDK 7 or above to be installed beforehand as it uses some of the latest features; the current recommended version is the very latest JDK 8. To check what version you have, in a shell/command window simply type:
javac -version or java -version
If the java command is not recognised then you will have to install the JDK which can be downloaded from here:
http://java.sun.com/javase/downloads/index.jsp
2. Set the JAVA_HOME variable to the JDK location:
An easy tip to determine the location of where your JDK (one or multiple versions) is installed is to enter the following command into your shell box:
sudo update-alternatives --config java
Set your JAVA_HOME variable as follows:
export JAVA_HOME={jdk-installation-directory}
(in the example above: /usr/lib/jvm/java-8-oracle)
To persist the variable across sessions, simply add the export to the current user’s .bashrc file.
This is a hidden file in the user’s home directory; /home/$user/.bashrc.
3. Downloading Payara Server
Payara Server can be downloaded from: http://www.payara.fish/downloads
Download to a directory of your choosing and then unzip.
In the case of Payara to run the server, change directory to install_directory/payara41/bin and enter the following command:
./asadmin start-domainThis will start domain1, which is the default domain included with Payara Server. If you were to create a new domain, that would need to be specified explicitly – like with Payara’s payaradomain. To maintain compatibility with GlassFish, though, domain1 is preferred if no domain is specified, rather than throwing an error from version 4.1.153 and up. Accessing the Administration Console
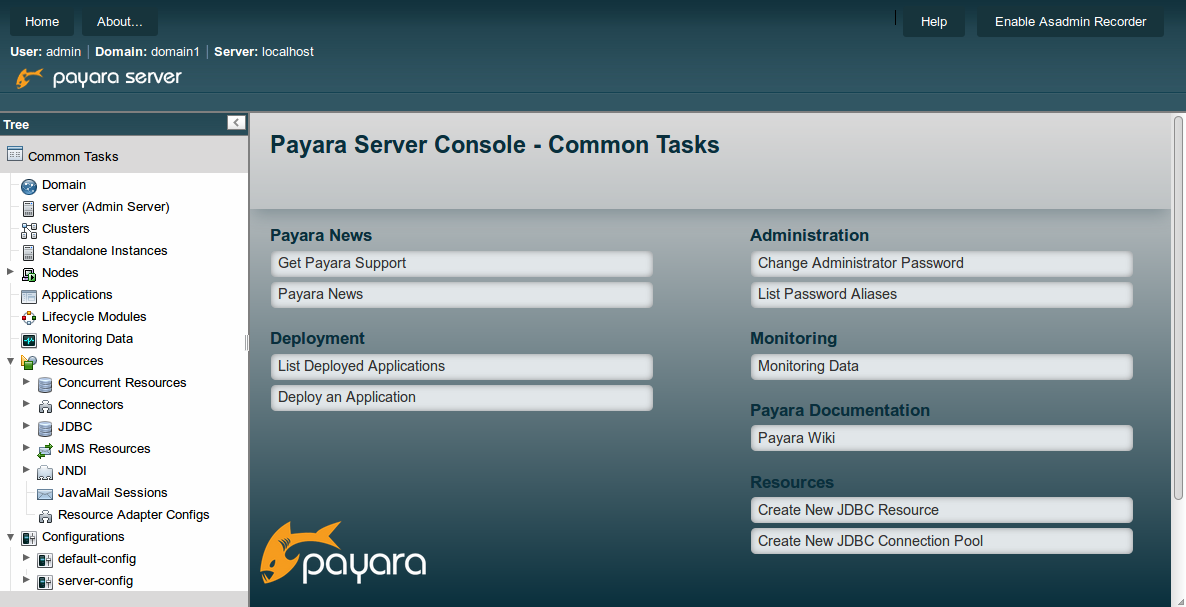
Once the server is up running, navigate to http://localhost:4848 to access the console. Your page should look something like this:
See Part 2 here: How to Deploy an Application on Payara Server / GlassFish 4.1

Note: There is an updated version of this blog available for Installing Payara Server 5 on Ubuntu.
Share:

 4 minutes
The March 2026 release brings important platform modernization, stability improvements, and comprehensive bug fixes across the Azul Payara Platform […]
5 minutes
The February 2026 release of the Payara Platform is centered on a major initiative to streamline the platform. This involves removing […]
3 minutes
As we begin 2026, we’re pleased to announce new releases across all Payara Platform editions this January: Payara Platform […]
good intro blog / keep on sharing on this good platform
I thought bog was very good…I would like to see one thing added and, that is all of the ports payara41 uses
I thought the blog was very good but needs one thing, IMOP, and that is all of the ports payara41 uses
Thanks for your feedback Larry!
Set up the JAVA_HOME environment variable was not enough to me. I have to set up the AS_JAVA variable in the config file {payara-home}/glassfish/config/asenv.conf as AS_JAVA=$JAVA_HOME.
how to download and install payara on ubuntu server using the cli i couldn’t find a download link
thank you