How to Secure Payara Server with Apache
Payara

In a previous blog of this series we set up Apache httpd to forward traffic to Payara Server. However, this only covers forwarding HTTP and not HTTPS. This blog will demonstrate how to secure Payara Server with Apache over HTTPS on Ubuntu.
What is HTTPS?
HTTPS, or Secure HTTP encrypts the traffic to prevent anyone from tampering with the message or eavesdropping on it, although this only works as long as both endpoints maintain the secure channel. You will know when you are on a website using HTTPS as your browser will display a green padlock to the left of the address bar and the URL will start with https:// as shown in Firefox:
How Do I Set up Apache to Forward HTTPS Requests?
Presuming that you have already set up Apache httpd as in the previous blog there are several additional modules that must be enabled. To enable them, use the a2enmod command as shown:
sudo a2enmod proxy proxy_ajp proxy_http rewrite
proxy_balancer proxy_connect proxy_html xml2enc ssl
And then restart the server:
sudo service apache2 restart
At this point if you go to https://localhost in a browser it will return a 502 error. This is because you do not have an SSL certificate configured for use in the Apache web server.
How do I get an SSL certificate?
Both domain1 and payaradomain (default domains shipped with most distributions) come with sample, pregenerated SSL certificates that use Payara Limited Services as its OU for the localhost domain. Also, when creating a new domain in Payara Server, a new SSL certificate is generated in the same way for the current hostname of the machine where the command is run. However, this should NOT be used in production, it is strongly recommended that you get a custom certificate from a trusted Certificate Authority for production usage. For instructions on how to use a custom SSL certificate with Payara Server, see our blog post on “Securing Payara Server with Custom SSL Certificate“. Both the keystore and truststore for Payara Server can be found in the config directory of the relevant Payara Server domain. The default certificate for Payara can be found in keystore.jks within that directory. The keystore used in Payara Server is a JKS or Java KeyStore; different to Apache Server which uses the PKCS12 type. The Java Keytool can be used to convert a JKS keystore to a PKCS12 store with the following steps:
keytool -export -alias s1as -keystore keystore.jks -rfc -file public.cert

keytool -importkeystore -srckeystore keystore.jks -destkeystore mystore.p12 -srcstoretype JKS -deststoretype PKCS12 -srcstorepass changeit -deststorepass mysecret -srcalias s1as -destalias s1as -destkeypass mykeypass -noprompt

openssl pkcs12 -in mystore.p12 -out mystore.pem -passin pass:mysecret -passout pass:mysecret
You will now have the files public.cert which is the SSL certificate and mystore.pem which is the key file and has the password of mysecret.
Editing the configuration
Now that you have the certificate and key you need to edit the Apache configuration file. If you followed the previous blog it will be under /etc/apache2/sites-available/payaraSite.conf. If the file does not exist, run the following command to create it:
Now, you should find the following section in the file, which starts with <VirtualHost *:80> as below:
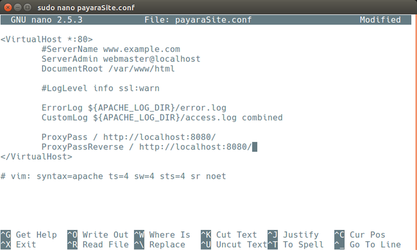
Add the following configuration fragment:
<VirtualHost *:443>

        ErrorLog ${APACHE_LOG_DIR}/error.log
        CustomLog ${APACHE_LOG_DIR}/access.log combined

        SSLProxyEngine On
        SSLProxyCheckPeerExpire on

        SSLCertificateFile /path/to/payara/payara41/glassfish/domains/domain1/config/public.cert
        SSLCertificateKeyFile /path/to/payara/payara41/glassfish/domains/domain1/config/mystore.pem

        ProxyRequests Off
        ProxyPreserveHost Off

        ProxyPass / http://localhost:8080/
        ProxyPassReverse / http://localhost:8080/

</VirtualHost>
Note that the Payara Server port we are proxying to is still the HTTP port. This is because the Payara Server instance is local to the Apache webserver, so encryption is not needed at this point and would slow things down. Port 8080 should not be exposed to the internet and should be behind a firewall. For
The default certificate is only valid for localhost and will return a 502 error if you try accessing it via the 127.0.0.1 address or your hostname. SSLProxyCheckPeerExpire makes sure that the certificate is not out of date.SSLCertificateFile and SSLCertificateKeyFile are the paths for the both the certificate and private key files respectively.
Now restart the ApacheServer.
You will be required to type in the password for your key file, which will be set to the value used earlier of mysecret. You will be required to type it in every time the Apache server starts.
Storing the key password
It is very important to note that it is a security risk to store this password on the server. In production, this file must be encrypted, but it is better not to store it at all.
To avoid retyping the password for the key every time you restart Apache, you can create a bash script to automatically input the password. As the root user in the /etc/apache2 directory, create a file called “password.sh”. Open it with your preferred text editor and write the following:
#!/bin/sh
echo "mysecret"
Where mysecret is the password of the key file if you set it to be something other than the default. Then make the file executable by running
Finally, add the following configuration element in your virtual host definition:
Now when you start Apache you will no longer be asked for the password to your keyfile. If you go to https://localhost you will see a security warning which should look something like this:
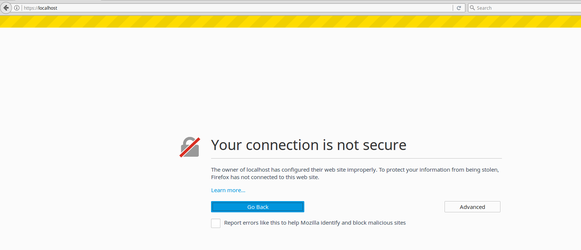
This is because you are using a self-signed certificate rather than an externally verified certificate issued by a Certificate Authority such as LetsEncrypt or Verisign. Click on Advanced and then Add Security Exception you will be able to reach the Payara Server home page.
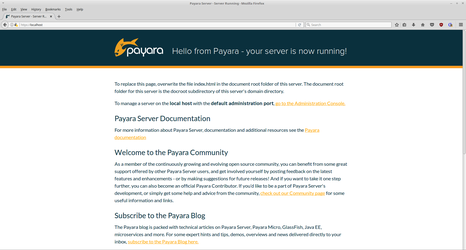
Success! You have now reached Payara’s welcome screen using HTTPS.
Share:

 1 minute
Earlier this week, we’ve launched the 2026 Payara Platform Community Survey and we’d love to hear from you. If […]
 4 minutes
Strategic acquisition bolsters Azul’s Java platform with complementary products, deep Java expertise and accelerated go-to-market capabilities SUNNYVALE, Calif., and MALVERN, […]
 3 minutes
When legacy systems approach end-of-life (EOL), enterprise IT teams typically face the choice of moving forward at all costs […]
so I complained to another guy from blog.payara about the thing that not one single tutorial is working for me.
I used that tutorial, but i wanted to run apache on 443 port, and make apache listen on another port for forwarding (as proxy) to payara. I changed the port number in sites available conf but does not take care about changing/modifing the port.conf file, ports that apache is listening on. So it did not work, but finally I figured out my fail, and its now working. Thx for your tutorial and afford.
Maybe add another line to issue that? I think that most people want to run apache on default ports 80 and 443 and not just as proxy.
Why I go that way is also the impossibility for me to make the letsencrypt certificate working on payara on the same host with apache.
Maybe my comment could be helpful for another people.
Hi,
do you know about a good tutorial or solution, how to set up the same that you described above but with addition of wss, secure websocket. Proxying https to http and wss to ws? or wss?
Would be very nice, if you could help me.