Connect Payara Micro to External JMS Broker by Deploying a RAR file
Payara
Payara Micro is a lightweight middleware platform for containerized Jakarta EE application deployments, but it still provides a lot of APIs and functionality for developers. On top of all Jakarta EE Web Profile APIs, Payara Micro also supports a additional Jakarta EE APIs, and it also provides the same MicroProfile, Payara, and JCache APIs as our complete application platform, Payara Server. In this article, we’ll show you how to make use of Jakarta Messaging (JMS) in Payara Micro to send and receive messages to and from a JMS broker.
{{cta(‘0c1037e0-adaf-4401-b888-05088602db6a’)}}
Jakarta Messaging (JMS), formerly known as Java Message Service, is supported by various message brokers. Payara Micro doesn’t contain a JMS broker on its own so we’ll need to connect to an external broker. We need to deploy a JMS resource adapter (RAR) for our target broker, and configure it to connect Payara Micro to the broker as a JMS client.
We’ll use a demo application that sends a message to a JMS broker and then listens to the same message and prints it into the log.
Click here for the source code of the demo application.
The simplest way to use a JMS broker with Payara Micro is to use OpenMQ as the JMS broker. OpenMQ is very well supported by the Payara Platform. It is even bundled with Payara Server which uses it as the default JMS broker. It’s very natural to use OpenMQ with Payara Micro if you’re already familiar with Payara Server.
We’ll need to do the following to execute the demo JMS application on Payara Micro using OpenMQ as a message broker:
While OpenMQ is the default message broker in Payara Server, there are other JMS message brokers that you can use with Payara Micro. For example, ActiveMQ is a popular open source message broker and it can be easily integrated with Payara Micro because it provides an official resource adapter RAR. However, this resource adapter only supports the JMS 1.1 API. Therefore Payara Micro supports sending messages to and receiving them from ActiveMQ only using the JMS 1.1 API. Using new features of JMS 2.0 will cause errors.
If you want to use ActiveMQ, you can follow the instructions for OpenMQ with a few differences. The biggest difference is that OpenMQ and ActiveMQ understand different non-standard properties in the connection definition and MDB configuration. We’ll first explain how to use OpenMQ with Payara Micro and then describe what to do differently for ActiveMQ at the end of this article.
See also: Connecting to ActiveMQ with Payara Server.
To start using the JMS API to send messages, we need to define two resources via the Java EE Connector Architecture (JCA) API: a connection factory and a destination.
We’ll define a connection factory using the annotation @ConnectionFactoryDefinition placed on any EJB class, preferably on the class that will use it:
@ConnectionFactoryDefinition ( name = "java:app/jms/SendJMS",
    interfaceName = "javax.jms.ConnectionFactory",
    resourceAdapter = "imqjmsra",
    properties = {"UserName=openmq","Password=password", "AddressList=localhost:7676"})
We specified the following required connection factory properties:
We also explicitly specified the connection properties using the properties property to demonstrate how to overwrite the default values:
If we don’t specify these properties, the resource adapter will use the default address and port localhost:7676 and the anonymous user guest.
Next we’ll define the queue:
@AdministeredObjectDefinition ( resourceAdapter = "imqjmsra",
    interfaceName = "javax.jms.Queue",
    className = "com.sun.messaging.Queue",
    name = "java:app/jms/TestQ",
    properties = {"Name=TestQ"})
The queue has to be named with a JNDI identitier. It also has to specify the resource adapter and specify the type javax.jms.Queue in the interfaceName property.
We specified the Name property to bind this queue to the TestQ queue in the OpenMQ broker. We don’t need to create this queue in the OpenMQ broker. If it doesn’t exist, it will be created.
The className property has to specify the queue implementation. This is com.sun.messaging.Queue for OpenMQ. This class and the Name property that specifies the name of the queue in the broker are specific to OpenMQ. They may be different if we use another broker like ActiveMQ.
Finally, we’ll create a stateless EJB and inject the connection factory and the queue as the following fields:
@Resource(lookup = "java:app/jms/SendJMS")
private ConnectionFactory factory;

@Resource(lookup = "java:app/jms/TestQ")
private Queue queue;
Then we’ll use the simplified JMS 2.0 API to send a message:
try (JMSContext context = factory.createContext()) {
    context.createProducer().send(queue, "This is a message");
}
We’ll create a message-driven bean (MDB) to recieve messages:
@MessageDriven(name = "testmdb", activationConfig = {
    @ActivationConfigProperty(propertyName = "resourceAdapter", propertyValue = "imqjmsra"),
    @ActivationConfigProperty(propertyName = "destinationType", propertyValue = "javax.jms.Queue"),
    @ActivationConfigProperty(propertyName = "destination", propertyValue = "TestQ"),
    @ActivationConfigProperty(propertyName = "userName", propertyValue = "openmq"),
    @ActivationConfigProperty(propertyName = "password", propertyValue = "password"),
    @ActivationConfigProperty(propertyName = "addressList", propertyValue = "localhost:7676")
})
public class ReceiveMessage implements MessageListener {

    @Override
    public void onMessage(Message message) {
    }
}
The ReceiveMessage MDB is a class with the @MessageDriven annotation that implements the method onMessage from the MessageListener interface. This method is called for every incoming message.
The activation config properties are analogous to the properties in the connection factory and the queue which we use for sending messages. The property destinationType is analogous to the interfaceName in the queue definition, the property destination is analogous to the OpenMQ-specific Name property. All other properties are analogous to properties with a similar name.
OpenMQ resource adapter is distributed together with the OpenMQ broker. Therefore we’ll first download and install OpenMQ from its download page as a ZIP file and unpack it to a local directory. If you already have Payara Server installed, you can skip this step and use OpenMQ in the Payara Server installation which is located in the mq directory.
The resource adapter is located in the OpenMQ installation directory. It’s the file imqjmsra.rar in the lib directory. We’ll copy it to the project directory.
The resource adapter imqjmsra.rar is installed by deploying it to Payara Micro in the same way as an application archive (e.g. a .war) is deployed. The following shows an example:
java -jar payara-micro.jar imqjmsra.rar
The connector is subsequently available to all other applications deployed to Payara Micro.
The name of the deployed connector will be the name of the file without the .rar extension. In this case it will be imqjmsra. Our demo application already expects a connector with this name to use it for incoming and outgoing messages.
We can run our demo application demo.war by deploying it after the rar file:
java -jar payara-micro.jar imqjmsra.rar myapp.war
To simplify starting our application, we’ll bundler Payara Micro and the rar file together with the –outputUberJar option:
java -jar payara-micro.jar imqjmsra.rar --outputUberJar payara-micro-mq.jar
The created JAR file payara-micro-mq.jar is a custom Payara Micro launcher that already contains the deployed resource adapter.
We can now start our application using this launcher instead of the standard Payara Micro JAR file, without supplying the resource adapter:
java -jar payara-micro-mq.jar demo.war
With our application and OpenMQ resource adapter ready to be deployed, it’s time to start the message broker. To start the the OpenMQ broker, go to the OpenMQ installation directory and execute the following command:
bin/imqbrokerd
To verify that your OpenMQ broker is up and running, you can start the GUI admin tool called imqadmin. Execute the following command from the OpenMQ installation directory:
bin/imqadmin
The OpenMQ Administration Console will open in a new desktop window:
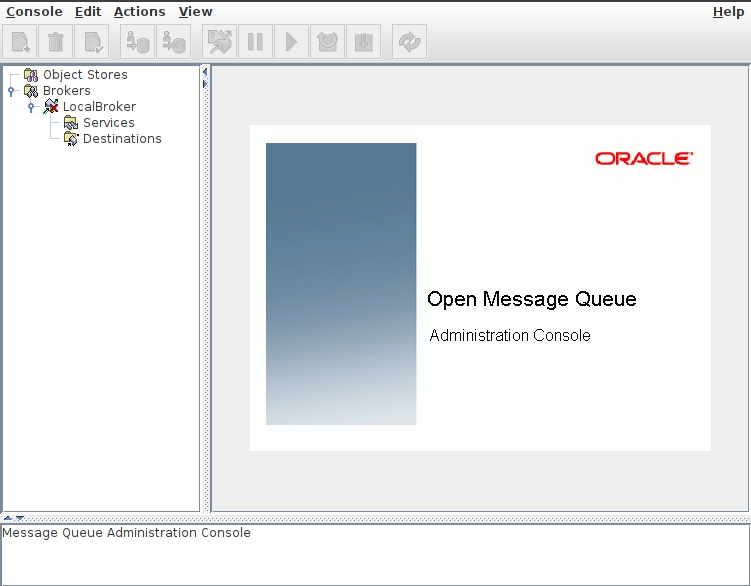
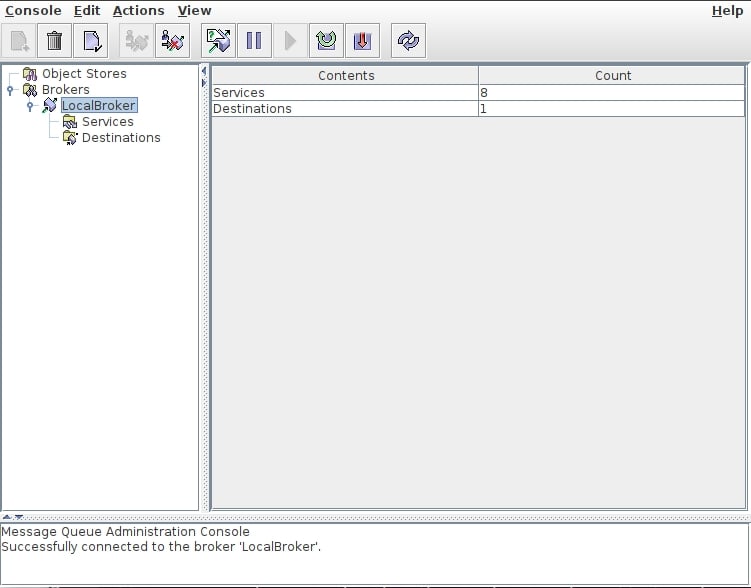
Then connect to the LocalBroker broker with the default admin user admin and password password. After you connect, you’ll be able to see the number of services and destinations in the broker:
By default, OpenMQ allows anonymous connections using the guest user. Application running on Payara Micro will connect using this user if no user name and password is specified.
Our demo application connects to the OpenMQ broker using an openmq user. This user doesn’t exist in the default OpenMQ installation therefore we need to create it. The GUI Administration Console doesn’t support managing users so we’ll use the imqusermgr command line tool. The following command will create an openmq user with password password:
bin/imqusermgr add -u openmq -p password
Once we have OpenMQ broker running and accessible with the user openmq, we’ll run it using our custom Payara Micro JAR payara-micro-mq.jar that bundles the OpenMQ resource adapter:
java -jar payara-micro-mq.jar demo.war
Payara Micro will first deploy the OpenMQ adapter. Then it will deploy our demo application which sends a message to the TestQ queue in the OpenMQ broker every 5 seconds. The OpenMQ broker immediately sends the message from the TestQ queue back to our application. The messages are dispatched to the MDB that listens to messages from the TestQ. The MDB then prints the message with its metadata to the console.
Until now, we hard-coded all the configuration for the resource adapter in the source code. Most applications need to be configured externally so that they can be adapted to the environment.
We’ll now improve our demo application so that all variable aspects of the resource adapter configuration can be configured externally when launching the application, e.g. by system properties or environment variables.
Payara Micro supports variable references in Jakarta EE resource annotations, including the annotations we used to define the connection factory, queue and MDB. We’ll take advantage of this and we’ll replace all non-constant values with variable references. We’ll use references to MicroProfile Configuration properties which has several benefits:
We’ll first create a file microprofile-config.properties. This file should end up in the META-INF directory in the classpath. In a WAR it should thus end up in WEB-INF/classes/META-INF. In our maven-based project, we’ll create the file in src/main/resources/META-INF directory.
We’ll write the following into the microprofile-config.properties file to define the default values which we want to allow to overwrite:
mq.username=openmq
mq.password=password
mq.addressList=localhost:7676
mq.queue.name=TestQ
Then we’ll replace all the corresponding values above in the annotations for the connection factory, queue and MDB with the references to their corresponding MicroProfile properties. For example, we’ll replace “TestQ” with “${MPCONFIG=mq.queue.name} and “localhost:7676” with ${MPCONFIG=mq.addressList}. This is how our connection factory definition will look like:
@ConnectionFactoryDefinition (name="java:app/jms/SendJMS",
        interfaceName = "javax.jms.ConnectionFactory",
        resourceAdapter = "imqjmsra",
        properties = {"UserName=${MPCONFIG=mq.username}","Password=${MPCONFIG=mq.password}", "AddressList=${MPCONFIG=mq.addressList}"})
Then we can overwrite the properties by specifying a system property when launching our application:
java -Dmq.password=newpassword -jar payara-micro-mq.jar demo.war
We can also specify the properties using environment variables, e.g. mq_password for the mq.password property ( the . character is changed to _):
export mq_password=newpassword
java -jar payara-micro-mq.jar demo.war
And finally, we can specify all properties in an external properties file using the Payara Micro command line option –systemProperties:
java -jar payara-micro-mq.jar --systemProperties config.properties demo.war
If you prefer to use ActiveMQ, connecting to ActiveMQ is similar to connecting to OpenMQ, with the following differences:
Since the name of the ActiveMQ resource adapter will be different, e.g. activemq-rar, we also need to change the resource adapter name in the connection factory, queue and MDB definitions. Here’s what they all would look like (differences from OpenMQ highlighted):
@ConnectionFactoryDefinition ( name = "java:app/jms/SendJMS",
    interfaceName = "javax.jms.ConnectionFactory",
    resourceAdapter = "activemq-rar",
    properties = {"ServerUrl=tcp://127.0.0.1:61616", "UserName=admin", "Password=admin"})
@AdministeredObjectDefinition ( resourceAdapter = "activemq-rar",
    interfaceName = "javax.jms.Queue",
    className = "org.apache.activemq.command.ActiveMQQueue",
name = "java:app/jms/TestQ",
properties = {"PhysicalName=MyQueue=TestQ"})
@MessageDriven(name = "testmdb", activationConfig = {
    @ActivationConfigProperty(propertyName = "resourceAdapter", propertyValue = "activemq-rar"),
    @ActivationConfigProperty(propertyName = "destinationType", propertyValue = "javax.jms.Queue"),
    @ActivationConfigProperty(propertyName = "destination", propertyValue = "TestQ")
})
And here’s how we send the message using JMS 1.1 API:
try (Connection conn = factory.createConnection()){
    Session sess = conn.createSession(true,Session.AUTO_ACKNOWLEDGE);
    sess.createProducer(queue)
        .send(sess.createTextMessage("This is a test at " + new Date()));
}
Finally, we need to start ActiveMQ and Payara Micro with the ActiveMQ adapter and our application.
Start ActiveMQ with the following command:
bin/activemq console
Then start the application:
java -jar payara-micro.jar activemq-rar.rar demo.war
That’s it. By now, you should be able to connect Payara Micro to OpenMQ or ActiveMQ and build microservices that communicate asynchronously using JMS. You can also connect to other JMS brokers, you just need to use using a resource adapter for them and modify the JMS and MDB properties specific for that adapter.
{{cta(‘0c1037e0-adaf-4401-b888-05088602db6a’)}}
Share:

 7 minutes
If you worked with MicroProfile Health, you already understand the value of exposing application health information through standardized endpoints. […]
 1 minute
Modern high-frequency trading (HFT) platforms operate under extreme performance constraints, processing tens of thousands of messages per second while […]
 1 minute
Earlier this week, we’ve launched the 2026 Payara Platform Community Survey and we’d love to hear from you. If […]